Need support? Contact us here!
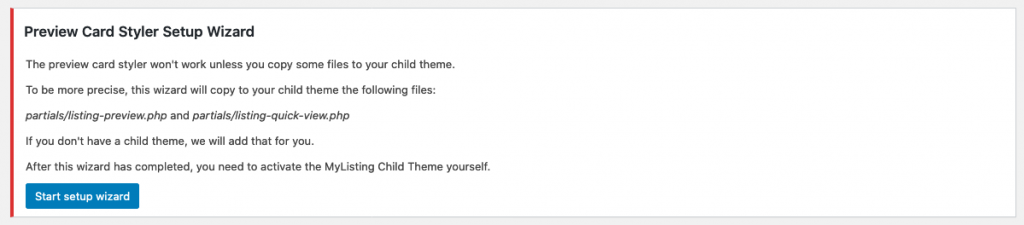
Download the zip file from the downloads page in your account.
Upload & install the ml-elementor-toolkit-pro.zip to your wordpress installation.
Activate the plugin, and you should see a notice popping up to set up the plugin. Run the setup wizard to finalize the plugin installation.
Congratulations! You are now ready to create your first preview card with Elementor.
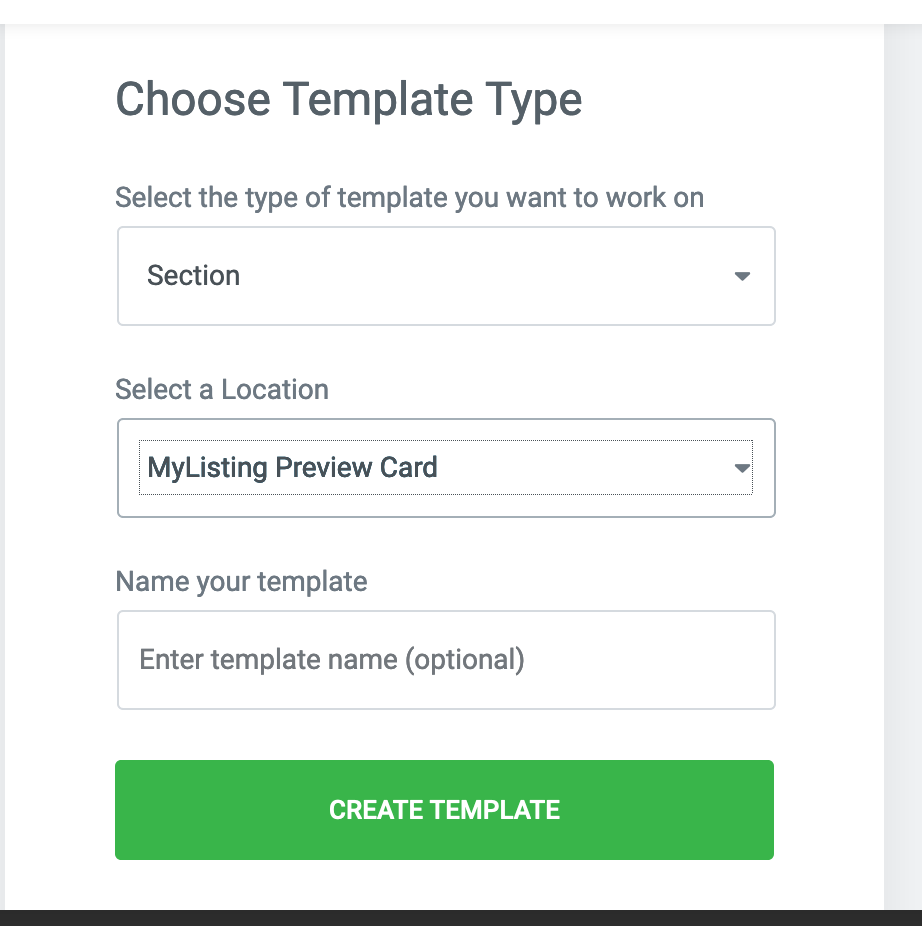
Now that you have installed the plugin and activated the child theme, go to Templates – Saved templates, click Add New.
Select Section as the template type, and select MyListing Preview Card as the location.
Give the template any name you like, and click Create template!
Alternatively, you can click Import templates at the top of the page, and import the demo templates that you can find in the demo-import-files/ folder
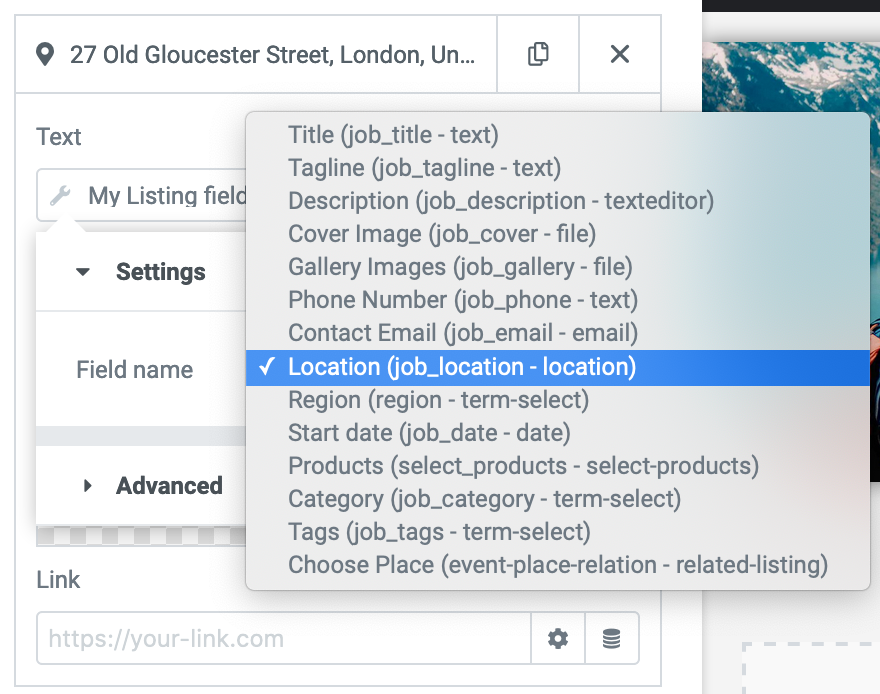
Now get your Elementor skills out, and use the dynamic tags, button widget and display conditions to create your own My Listing Preview cards!
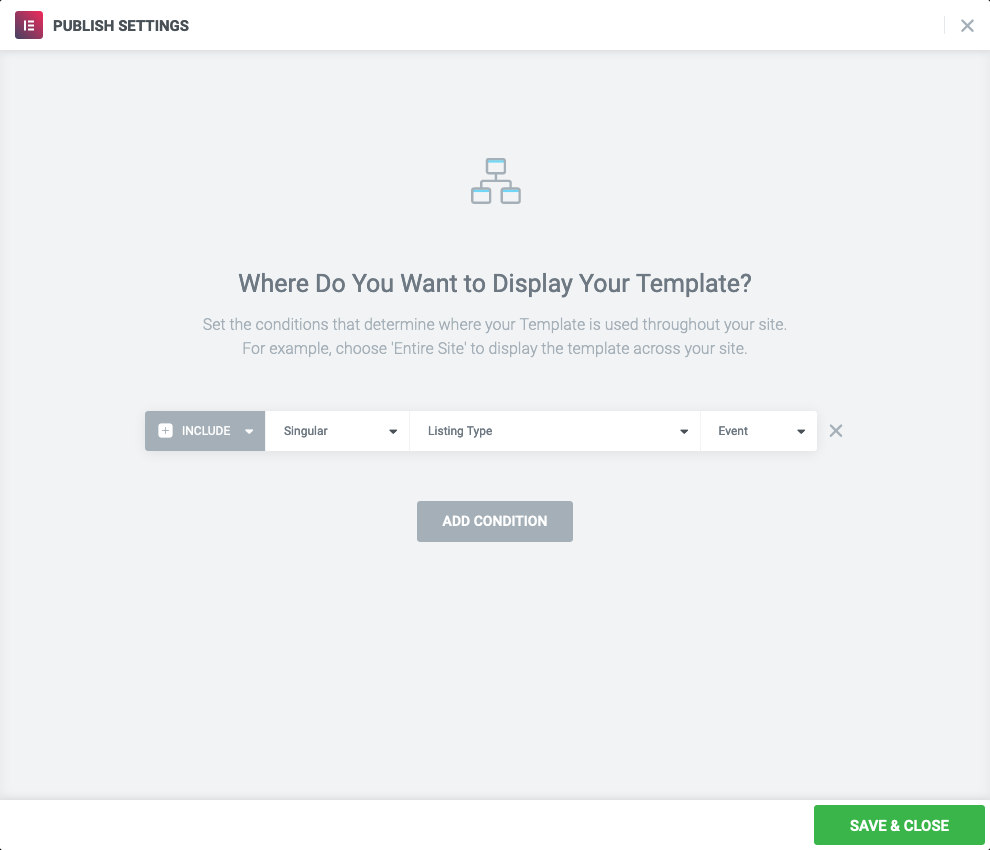
The display conditions can be used to specify which listing type(s) the design should be applied to.
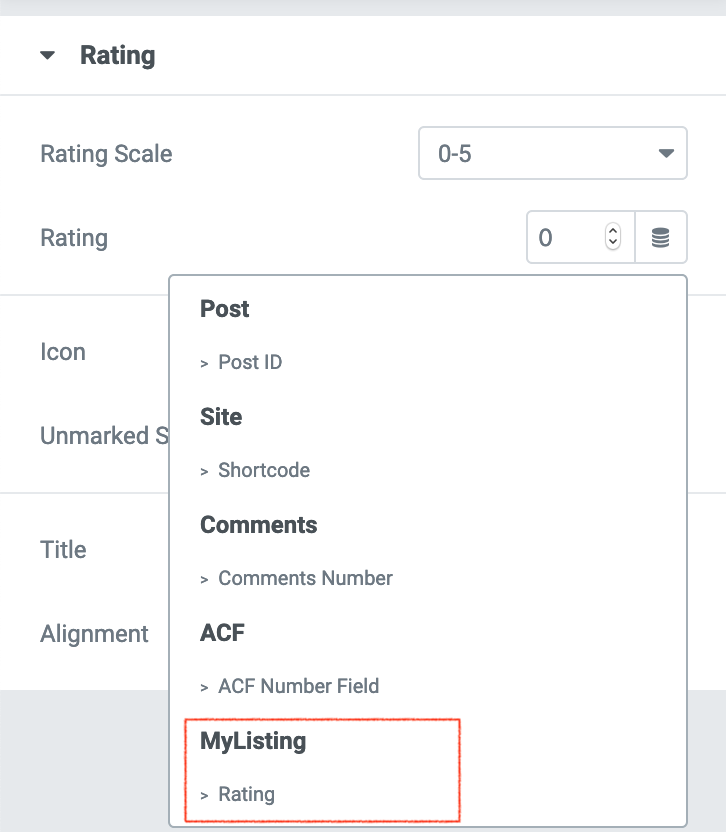
Currently 3 tags are supported:
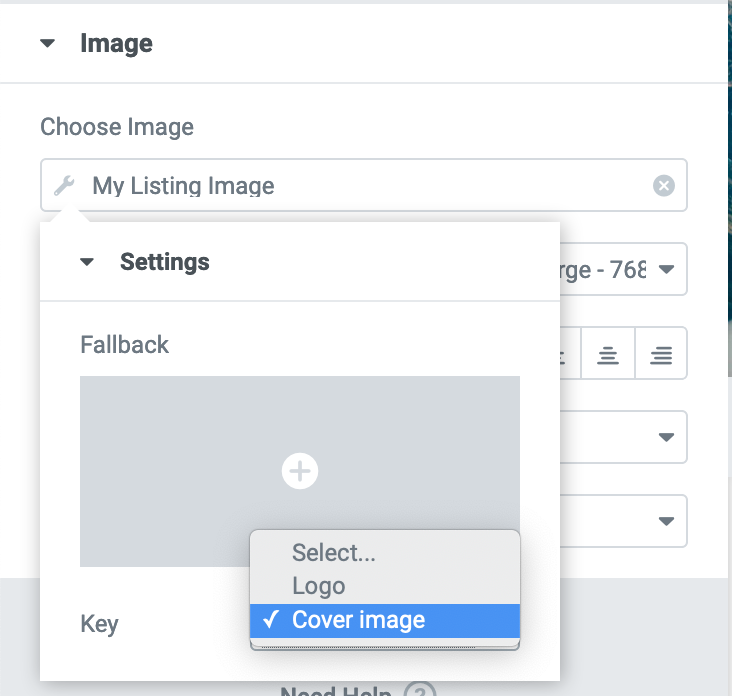
To make the MyListing fields visible, a few steps are needed.
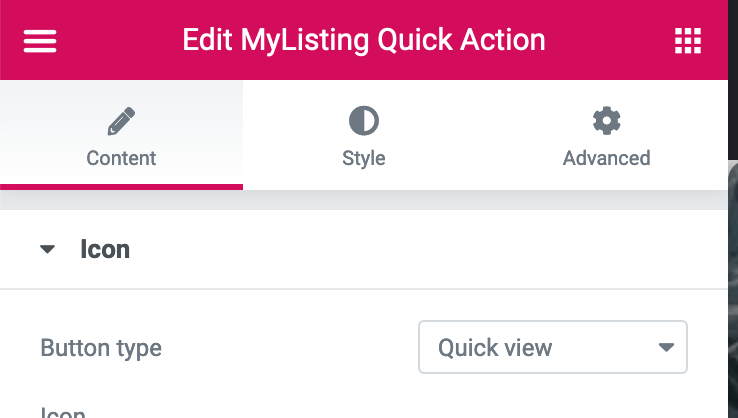
A custom widget is added to add the MyListing buttons for quick preview and bookmark.
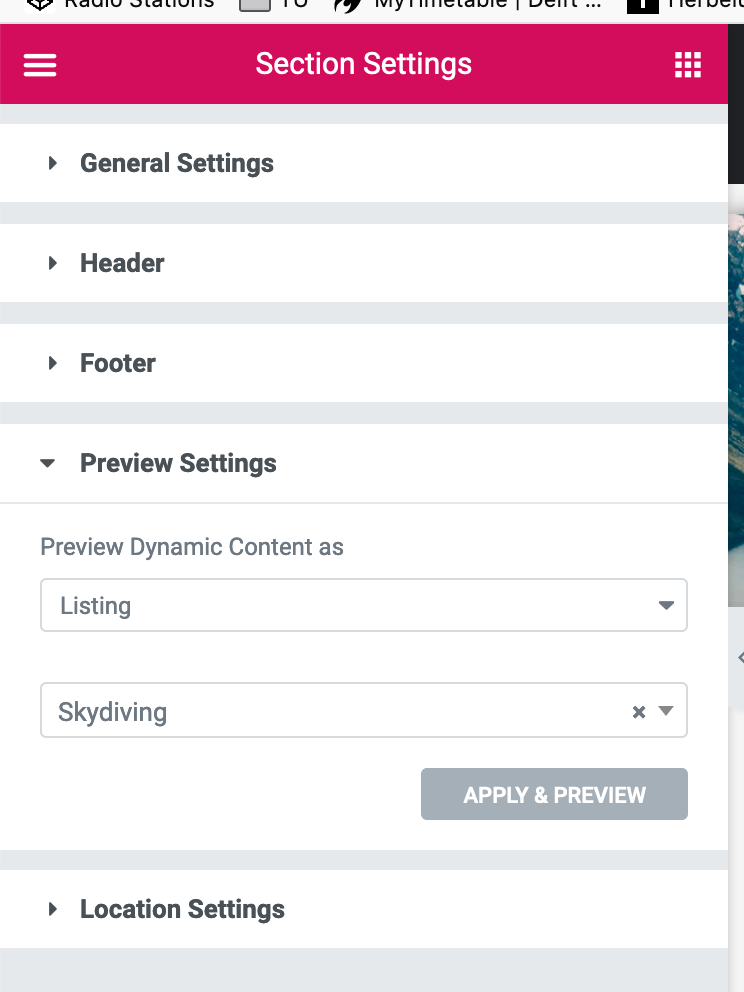
You can use the conditions settings to determine where your listing card design should be visible.
To set the conditions correctly, choose Singular, Listing Type, and choose your listing type in the 3rd dropdown.
Ask your questions about pricing, features and support here. We will try to reply within 24 hours.